
How to Get a Seamless Finish When Patching Drywall inYalaha Florida
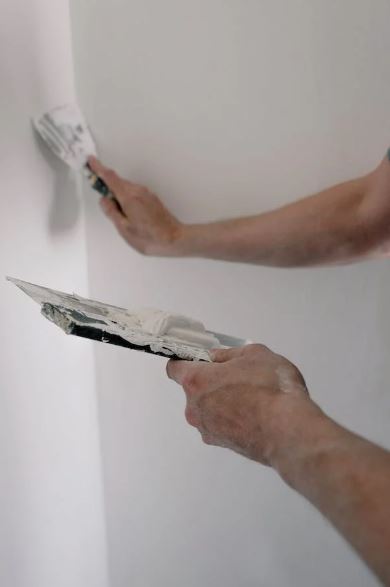
Drywall is an essential part of modern buildings, but it can easily become damaged over time, leaving your home or office looking shabby and run-down. Fortunately, patching drywall is an easy fix for small cracks and holes, and with the right tools and techniques, you can make your walls look as good as new. In this article, we’ll share some tips on how to get a seamless finish when patching drywall, with advice from Ben Handyman, a reliable handyman service in Yalaha, Florida. First, let’s talk about the tools you’ll need for the job. You’ll need a putty knife, sandpaper, drywall tape, joint compound, and a drywall patch. You can purchase these items at your local hardware store or home improvement center in Yalaha, Florida. The size of the patch you’ll need will depend on the size of the hole or crack you’re repairing. It’s important to measure the damaged area to ensure you get the right size patch. Once you have your tools, it’s time to get started. Start by using a putty knife to remove any loose pieces of drywall around the damaged area. Next, clean the area with a damp cloth or sponge to remove any dust or debris. Apply a strip of drywall tape over the damaged area, making sure it’s flush against the wall. This will help keep the joint compound in place and prevent cracking in the future. Now it’s time to apply the joint compound. This is where the art of drywall repair comes in. Ben Handyman recommends using a 6-inch taping knife to apply a thin layer of joint compound over the tape. It’s important to spread the compound evenly and to make sure it’s flush with the surrounding wall. If you apply too much compound, you’ll end up with a lumpy finish that will be difficult to sand down. If you apply too little, the repair won’t be strong enough. Once the joint compound is dry, use fine-grit sandpaper to smooth out any rough spots or bumps. Be careful not to sand too much, as you can easily sand through the joint compound and tape, leaving the patch uneven. If you’re not confident in your sanding skills, Ben Handyman can help. They have years of experience patching drywall and can provide professional results that will leave your walls looking smooth and seamless. After sanding, you’ll need to apply a second coat of joint compound. This time, use a wider taping knife (around 10 inches) to spread the compound over the patch and surrounding wall. Again, be sure to apply the compound evenly and to make it flush with the surrounding wall. Let the compound dry completely, and then sand it down with fine-grit sandpaper until it’s smooth and even. Finally, it’s time to prime and paint the patch. Make sure the joint compound is completely dry before you start. Apply a coat of primer to the patch and let it dry according to the manufacturer’s instructions. Once the primer is dry, you can paint over the patch with the same color as the surrounding wall. If you’re not confident in your painting skills, Ben Handyman offers painting services in Yalaha, Florida, and can help you achieve a professional finish. In conclusion, patching drywall is a simple and affordable way to fix small cracks and holes in your walls. With the right tools and techniques, you can achieve a seamless finish that will make your walls look as good as new. If you’re not confident in your handyman skills, don’t hesitate to call in the professionals. Ben Handyman is a trusted local handyman business that can help you with all your home repair needs, including drywall repair and patching. Contact Ben Handyman about Drywall Patching Call or text: 352-561-3616 Tap To Call Tap To Text Or Request Service REQUEST SERVICE Search terms you might use to find this page: Drywall patching tips Yalaha Florida Repairing damaged drywall Yalaha Fixing cracks in drywall Yalaha How to patch drywall in Yalaha Easy drywall repair in Yalaha Seamless drywall patching in Yalaha Handyman service for drywall repair Yalaha Patching drywall like a pro in Yalaha DIY drywall repair in Yalaha Drywall repair tools Yalaha Florida Where to buy drywall repair supplies Yalaha How to measure drywall patch size Yalaha Removing loose drywall pieces Yalaha Cleaning damaged drywall Yalaha Applying drywall tape in Yalaha Tips for using joint compound in drywall repair Yalaha Recommended taping knife size for drywall repair Yalaha Achieving a smooth finish in drywall patching Yalaha Sanding techniques for drywall repair Yalaha Professional drywall repair in Yalaha Applying a second coat of joint compound in Yalaha Using a wider taping knife for drywall patching Yalaha Priming the drywall patch in Yalaha Painting tips for a seamless finish in Yalaha Affordable drywall repair options in Yalaha Reliable handyman service for drywall repair Yalaha Professional results in drywall patching Yalaha Easy steps for drywall repair in Yalaha Local hardware store for drywall repair supplies Yalaha Choosing the right drywall patch size in Yalaha Step-by-step guide to patching drywall in Yalaha Repairing small cracks and holes in drywall Yalaha Tips from Ben Handyman for drywall repair in Yalaha Achieving a lumpy-free finish in drywall patching Yalaha Expert sanding advice for drywall repair Yalaha Painting the patched drywall in Yalaha Matching the color of the patched drywall to the surrounding wall Yalaha Professional painting services in Yalaha Simple and affordable drywall repair in Yalaha Trusted local handyman for drywall repair in Yalaha Home repair services in Yalaha, Florida Ben Handyman: Your go-to for drywall repair in Yalaha Reliable drywall patching in Yalaha Affordable options for patching drywall in Yalaha Easy and effective drywall repair techniques in Yalaha Professional drywall repair services in Yalaha DIY tips for patching drywall in Yalaha Best practices for drywall repair in Yalaha Quality drywall repair solutions in Yalaha Transforming your walls with drywall patching in Yalaha
How to Get a Seamless Finish When Patching Drywall in Winter Garden Florida
If you’re a homeowner, you’ve probably had to patch drywall at some point. Whether it’s because of a small hole from a nail or a larger hole from a doorknob, patching drywall is a common home repair project. But getting a seamless finish can be tricky. Fortunately, with a few tips and the right tools, it’s possible to get a flawless result. And if you’re in the Winter Garden, Florida area, Ben Handyman is here to help you get the job done right. First, let’s talk about the tools you’ll need. You’ll need a drywall saw or utility knife, sandpaper, joint compound, a putty knife, and a paintbrush. You may also want to have a drywall patch kit on hand, which includes a self-adhesive mesh patch and joint compound. The first step is to clean the area around the hole. If there are any loose pieces of drywall or debris, use a drywall saw or utility knife to remove them. Then, sand the edges of the hole with sandpaper to create a smooth surface. This will help the patch adhere better. If you’re using a drywall patch kit, peel off the backing from the self-adhesive mesh patch and place it over the hole. Smooth out any air bubbles, making sure the patch is firmly in place. If you’re not using a patch kit, cut a piece of drywall slightly larger than the hole and hold it in place over the hole. Then, use a pencil to trace around the edges of the patch. Next, use a putty knife to apply a thin layer of joint compound over the patch. Make sure the layer is smooth and even. Let the joint compound dry completely, which usually takes at least 24 hours. Once the joint compound is dry, use sandpaper to sand the area smoothly. Be careful not to sand too much, as you don’t want to create a depression in the patch. Wipe away any dust with a dry cloth. Apply a second coat of joint compound, this time making it slightly wider than the first coat. Let it dry and sand it smooth. Repeat this process until you have a smooth, even surface that’s level with the surrounding wall. When the patch is completely dry and smooth, you can paint over it. Use a paintbrush to carefully apply paint over the patch, being careful not to apply too much or create drips. You may need to apply more than one coat of paint, depending on the color and type of paint you’re using. It’s important to be patient when patching drywall. Rushing the process can lead to a less-than-perfect result. Taking your time and following the steps carefully will ensure a seamless finish. If you’re in the Winter Garden, Florida area and you’re not comfortable tackling this project on your own, Ben Handyman is here to help. With years of experience and a commitment to quality workmanship, we’ll get the job done right the first time. We’ll provide all the necessary tools and materials, so you don’t have to worry about a thing. And we’ll work quickly and efficiently, so you can get back to your daily routine as soon as possible. In addition to drywall repair, Ben Handyman offers a wide range of home repair and maintenance services, including painting, plumbing, electrical, and more. We’re committed to providing our customers with exceptional service at an affordable price. And we stand behind our work with a satisfaction guarantee. So, if you need help with drywall repair, or any other home repair project, contact Ben Handyman in Winter Garden, Florida. We’re here to help you get the job done right. Contact Ben Handyman about Drywall Patching Call or text: 352-561-3616 Tap To Call Tap To Text Or Request Service REQUEST SERVICE Search terms you might use to find this page: Patching drywall tips Winter Garden Florida Drywall repair Winter Garden FL How to patch drywall in Winter Garden Seamless drywall repair Winter Garden Home repair in Winter Garden, Florida Drywall patching tools Winter Garden Drywall repair tutorial Winter Garden FL Winter Garden drywall patching guide DIY drywall repair Winter Garden, Florida Patching a small hole in drywall Winter Garden Drywall repair services Winter Garden FL Winter Garden drywall repair experts Tips for flawless drywall patching Winter Garden Patching drywall in Winter Garden step by step Drywall saw for patching in Winter Garden Winter Garden joint compound application tips How to smooth drywall patch Winter Garden Winter Garden drywall repair techniques Drywall patch kit Winter Garden FL Drywall repair company in Winter Garden Winter Garden home repair professionals Patching a doorknob hole in drywall Winter Garden Winter Garden drywall patching and painting How to sand drywall patch Winter Garden Winter Garden drywall patching contractor Best drywall repair service in Winter Garden Winter Garden handyman for drywall repair Winter Garden drywall repair cost Drywall repair estimate Winter Garden FL Winter Garden professional patching service Patching drywall like a pro Winter Garden Winter Garden skilled drywall repair Drywall repair and maintenance Winter Garden Winter Garden expert home repair services Winter Garden drywall repair warranty Hiring a handyman in Winter Garden FL Winter Garden DIY drywall patching guide Winter Garden drywall repair materials Quick drywall patching Winter Garden Winter Garden drywall repair steps Drywall patching in Winter Garden made easy Winter Garden residential drywall repair Winter Garden affordable home repair Winter Garden reliable handyman services Winter Garden experienced drywall patching Drywall repair before painting Winter Garden Winter Garden trusted home repair company Winter Garden flawless drywall patching Drywall repair tips and tricks Winter Garden FL Winter Garden local handyman for drywall repair
How to Get a Seamless Finish When Patching Drywall in Windermere Florida
If you have ever had to patch a hole in your drywall, you know that getting a seamless finish can be a real challenge. However, with a few tips and tricks, you can achieve a professional-looking result that will leave your walls looking smooth and seamless. As a handyman business based in Windermere, Florida, Ben Handyman is here to help you achieve this goal. First and foremost, it is important to start with a clean and dry surface. This means removing any loose debris, such as drywall dust or old drywall tape, and wiping the surface clean with a damp cloth. Once the surface is clean, you can begin to patch the hole. To begin patching the hole, start by placing a self-adhesive mesh tape over the hole. This tape will help to provide additional support to the patch and prevent it from cracking or breaking over time. Once the tape is in place, apply a thin layer of joint compound over the tape, using a putty knife or trowel. Be sure to apply the joint compound in thin, even layers, and smooth it out as much as possible. After the joint compound has dried, sand the surface with fine-grit sandpaper until it is smooth to the touch. Be sure to sand in a circular motion to avoid leaving any scratches or marks on the surface. Once the surface is smooth, wipe it clean with a damp cloth to remove any dust or debris. The next step is to apply a second layer of joint compound. This layer should be slightly thicker than the first, but still thin enough to smooth out easily. Apply the joint compound with a putty knife or trowel, and use a sanding block or fine-grit sandpaper to smooth out any bumps or ridges. Once the second layer of the joint compound has dried, you can sand it down again to achieve a perfectly smooth finish. Be sure to wipe the surface clean with a damp cloth before proceeding to the final step. The final step in achieving a seamless finish when patching drywall is to apply a coat of primer to the patched area. This will help to ensure that the surface is even and smooth, and will also help the paint to adhere more effectively. Once the primer has dried, you can paint over the patched area using your desired color of paint. In addition to these steps, there are a few additional tips and tricks that can help you achieve a seamless finish when patching drywall. One of the most important is to use a high-quality joint compound, as this will help to ensure that the surface remains smooth and even over time. Additionally, be sure to use a sanding block or fine-grit sandpaper to achieve a perfectly smooth surface, as this will help to ensure that the patch blends in seamlessly with the surrounding area. As a handyman business based in Windermere, Florida, Ben Handyman is here to help you achieve a professional-looking finish when patching your drywall. Whether you need help patching a hole, repairing a crack, or performing any other drywall repair or installation task, our team of experienced professionals is here to help. In conclusion, patching drywall can be a challenging task, but with the right tools and techniques, you can achieve a seamless finish that will leave your walls looking smooth and flawless. By following the tips outlined in this article and working with a professional handyman like Ben Handyman, you can ensure that your drywall repairs are done to the highest standards of quality and professionalism. So why wait? Contact us today to learn more about how we can help you achieve the perfect finish for your drywall repairs. Contact Ben Handyman about Drywall Patching Call or text: 352-561-3616 Tap To Call Tap To Text Or Request Service REQUEST SERVICE Search terms you might use to find this page: Patching drywall in Windermere, Florida How to patch a hole in drywall in Windermere Tips for seamless drywall patching in Windermere, FL Achieving a professional finish for drywall repairs in Windermere Seamless drywall patching techniques in Windermere, Florida Handyman services for drywall repairs in Windermere, FL Ben Handyman in Windermere, Florida Drywall repair tips and tricks in Windermere, FL Windermere handyman for drywall patching Professional drywall repair in Windermere, Florida How to get a smooth finish when patching drywall in Windermere Expert drywall patching in Windermere, FL Ben Handyman’s tips for flawless drywall repairs in Windermere Step-by-step guide to patching drywall in Windermere, Florida Best practices for seamless drywall repairs in Windermere, FL How to achieve a seamless finish for drywall patches in Windermere Windermere drywall repair experts Handyman services for patching drywall in Windermere, Florida Tips for applying joint compound in Windermere, FL Achieving a professional-looking result for drywall patching in Windermere Windermere handyman business for drywall repairs Ben Handyman’s drywall patching techniques in Windermere, FL How to patch a hole in drywall like a pro in Windermere Professional handyman services in Windermere, Florida Tips for sanding drywall patches in Windermere, FL Windermere experts for seamless drywall repairs Best tools for patching drywall in Windermere, Florida Getting a flawless finish for drywall repairs in Windermere Ben Handyman’s drywall repair services in Windermere, FL Step-by-step instructions for patching drywall in Windermere, Florida Tips for applying primer to patched drywall in Windermere, FL Achieving a smooth surface for drywall patches in Windermere Windermere handyman for drywall installation and repair Expert advice on seamless drywall patching in Windermere, Florida Hiring a professional handyman for drywall repairs in Windermere, FL Tips for using self-adhesive mesh tape for drywall patching in Windermere Windermere’s top-rated handyman for drywall repairs Ben Handyman’s guide to flawless drywall patches in Windermere, Florida Step-by-step tutorial for achieving a seamless finish when patching drywall in Windermere Tips for choosing the right joint compound for drywall repairs in Windermere, FL Windermere handyman business specializing in drywall patching Expert tips for sanding drywall patches in Windermere, Florida Ben Handyman’s
How to Get a Seamless Finish When Patching Drywall in Tavares Florida
If you’re a homeowner, there’s a good chance that you’ll need to patch drywall at some point. Whether it’s due to accidental damage or simply wear and tear over time, it’s a common issue that most homeowners will face eventually. The good news is that with a little know-how and the right tools, you can easily patch drywall and get a seamless finish that looks like it was done by a professional. And if you live in Tavares, Florida, there’s a local handyman business that can help you get the job done: Ben Handyman. When it comes to patching drywall, one of the most important things to keep in mind is that the goal is to create a smooth, seamless finish that blends in with the surrounding wall. This can be tricky to achieve if you don’t know what you’re doing, but with a few tips and some practice, you can become a pro at patching drywall in no time. The first thing to do when patching drywall is to prepare the area. This means removing any loose debris, dust, and paint chips that may be in the way. Once the area is clean, you can begin to assess the damage and determine the best approach for repairing it. If the hole in the drywall is small (less than 3 inches in diameter), you can use a simple patch kit to fix the damage. These kits typically include a self-adhesive mesh patch and spackling paste, which you can use to cover the hole and create a smooth finish. For larger holes (more than 3 inches in diameter), you’ll need to cut out the damaged section of drywall and replace it with a new piece. To do this, you’ll need to measure the hole and cut a patch that is slightly larger than the damaged area. Once you’ve cut the patch, you can insert it into the hole and secure it with screws or drywall tape. After the patch is in place, the next step is to apply spackling paste to smooth out the surface and create a seamless finish. This is where the real skill comes in, as applying the spackling paste requires a bit of finesse and a steady hand. When applying the spackling paste, it’s important to work slowly and methodically. Use a putty knife to apply a thin layer of paste over the patch, being careful to smooth out any lumps or bumps as you go. You may need to apply multiple layers of spackling paste to achieve the desired finish, so be patient and take your time. Once the spackling paste has dried, you can sand it down with fine-grit sandpaper to create a smooth, even finish. Again, this is a process that requires a bit of patience and attention to detail, as you don’t want to sand too much and create a depression in the surface of the patch. Finally, once you’ve sanded down the spackling paste and created a smooth finish, you can prime and paint the patch to match the surrounding wall. This is where the patch really starts to blend in and look seamless, so be sure to take your time and match the paint color as closely as possible. If you’re not confident in your ability to patch drywall on your own, or if you simply don’t have the time to tackle the job yourself, you can always call in a professional handyman like Ben Handyman. A handyman can quickly and easily patch your drywall, leaving you with a smooth, seamless finish that looks like it was done by a pro. In Tavares, Florida, Ben Handyman is a trusted local handyman business that can help you with all your home repair needs, including drywall repair and patching. Their team of skilled handymen is here to help you get the job done right. Contact Ben Handyman about Drywall Patching Call or text: 352-561-3616 Tap To Call Tap To Text Or Request Service REQUEST SERVICE Search terms you might use to find this page: Patch drywall Tavares Florida Drywall repair Tavares FL How to patch drywall in Tavares, Florida Fixing drywall in Tavares FL Tavares Florida handyman for drywall patching Patching drywall tips in Tavares Tavares FL local handyman for drywall repair Ben Handyman Tavares Florida Drywall patching services in Tavares FL DIY drywall patching in Tavares, Florida Tavares FL drywall repair specialists Professional drywall patching in Tavares Patching drywall guide Tavares Florida Best drywall repair in Tavares FL Tavares Florida home repair services Handyman for drywall patching in Tavares Tavares FL local handyman for home repairs Drywall patching company Tavares Florida Patching drywall in Tavares FL Tavares Florida drywall repair contractors DIY guide to patching drywall in Tavares Local handyman services in Tavares FL Tavares FL home improvement experts Professional drywall patching services in Tavares Tavares Florida residential repairs Drywall repair contractor in Tavares FL Tips for patching drywall in Tavares, Florida Tavares FL handyman for home repairs Tavares Florida drywall patching experts Patching drywall in Tavares: step-by-step guide Tavares FL professional handyman services Drywall repair in Tavares Florida Tavares FL drywall patching specialists Ben Handyman services in Tavares Tavares Florida home maintenance and repair Local handyman for drywall repair in Tavares FL Tavares FL drywall patching techniques Patching drywall like a pro in Tavares, Florida Tavares Florida drywall repair and patching Handyman services in Tavares FL Tavares FL drywall patching tools Tavares Florida expert drywall repair Best handyman in Tavares for drywall patching Tavares FL home repair and maintenance Drywall patching instructions for Tavares, Florida Tavares Florida drywall repair cost Tavares FL drywall patching materials Ben Handyman: drywall repair in Tavares Tavares FL skilled handyman for drywall patching Tavares Florida residential drywall repairs
How to Get a Seamless Finish When Patching Drywall in Tangerine Florida
As a homeowner, there are few things more frustrating than finding a hole or dent in your drywall. Not only does it look unsightly, but it can also compromise the integrity of your walls. Fortunately, with a little effort and the right tools, it’s possible to repair drywall to create a seamless finish that looks like new. And if you’re in Tangerine, Florida, Ben Handyman is here to help. Before we dive into the specifics of patching drywall, it’s worth mentioning that if you’re not confident in your abilities to handle this task, it’s always a good idea to call in a professional. Ben Handyman has the experience and expertise necessary to tackle any drywall repair job, big or small, in Tangerine, Florida, and the surrounding areas. That being said if you’re feeling up to the task, here’s what you need to do to get a seamless finish when patching drywall: Step 1: Gather Your Materials Before you can start repairing your drywall, you’ll need to gather a few essential materials. Here’s what you’ll need: Spackling or joint compound Putty knife Sandpaper (medium and fine-grit) Primer and paint (matching the color of your walls) Drywall tape (if you’re dealing with a larger hole) Step 2: Prepare the Area Once you have your materials ready, the next step is to prepare the damaged area. Start by removing any loose or damaged pieces of drywall with a putty knife. Next, use sandpaper to smooth the edges of the hole or dent. If you’re dealing with a larger hole, you may need to use drywall tape to reinforce the area. Step 3: Apply the Spackling or Joint Compound Now it’s time to apply the spackling or joint compound. Use a putty knife to spread a thin layer of the compound over the damaged area. Be sure to apply enough compound to fill in the hole or dent, but not so much that it overflows onto the surrounding wall. Step 4: Sand the Area Once the spackling or joint compound has dried completely (this can take several hours or even overnight), use sandpaper to smooth the area. Start with medium-grit sandpaper to smooth out any bumps or ridges, and then switch to fine-grit sandpaper to create a smooth, even surface. Step 5: Prime and Paint Finally, it’s time to prime and paint the repaired area. Apply a coat of primer to the repaired area, and then wait for it to dry completely. Once the primer is dry, you can apply a coat of paint that matches the color of your walls. Be sure to feather the paint out from the repaired area to create a seamless finish. In conclusion, repairing drywall can be a daunting task, but with the right tools and a little bit of patience, it’s possible to get a seamless finish that looks like new. And if you’re in Tangerine, Florida, Ben Handyman is here to help. Whether you need help repairing drywall, installing a new light fixture, or tackling any other home repair project, we’re here to make sure your home is in tip-top shape. So why wait? Contact Ben Handyman today and let us help you get started on your next home repair project. Contact Ben Handyman about Drywall Repair Call or text: 352-561-3616 Tap To Call Tap To Text Or Request Service REQUEST SERVICE Search terms you might use to find this page: How to repair drywall in Tangerine, Florida Patching drywall in Tangerine, FL Ben Handyman drywall repair in Tangerine Seamless drywall repair in Tangerine, Florida Tips for repairing drywall in Tangerine Tangerine drywall repair services Best drywall repair in Tangerine, FL Tangerine, Florida home repair experts Professional drywall repair in Tangerine DIY drywall repair in Tangerine, FL Steps to patch drywall in Tangerine, Florida Finding a drywall repair specialist in Tangerine Tangerine drywall repair guide Handyman services for drywall repair in Tangerine, FL Expert tips for seamless drywall repair in Tangerine Tangerine, Florida home improvement services Ben Handyman’s drywall repair expertise in Tangerine Repairing drywall like a pro in Tangerine, Florida How to fix a hole in drywall in Tangerine, FL Tangerine drywall repair contractors DIY guide to drywall patching in Tangerine, Florida Tangerine drywall repair recommendations Ben Handyman’s drywall repair services in Tangerine, FL Step-by-step drywall repair in Tangerine, Florida Tangerine, Florida professional drywall repair Quick and easy drywall repair in Tangerine Reliable drywall repair in Tangerine, FL Tangerine drywall repair tutorial Ben Handyman’s drywall expertise in Tangerine, Florida Tangerine, Florida drywall repair specialists Pro tips for patching drywall in Tangerine Tangerine drywall repair cost estimate How to repair a dent in drywall in Tangerine, FL Tangerine drywall repair and painting services Ben Handyman’s home repair services in Tangerine, Florida Tangerine, Florida drywall repair professionals Comprehensive guide to drywall repair in Tangerine Tangerine drywall repair techniques Ben Handyman’s drywall repair guarantee in Tangerine, FL Tangerine, Florida drywall repair tips and tricks Reliable drywall repair company in Tangerine Tangerine drywall repair and renovation services Ben Handyman’s expert drywall repair in Tangerine, Florida Tangerine, Florida drywall repair step-by-step guide Professional drywall repair in Tangerine on a budget Tangerine drywall repair contractors near me Tangerine drywall repair DIY tutorial Ben Handyman’s drywall repair portfolio in Tangerine, FL Tangerine, Florida drywall repair materials and tools Trusted drywall repair services in Tangerine
How to Get a Seamless Finish When Patching Drywall in Plymouth Florida
If you’re a homeowner, you’ve probably faced the challenge of repairing drywall. It’s an essential skill to learn because it’s a common problem. Even a small hole or dent in the wall can be unsightly and can decrease the value of your property. If you’re living in Plymouth, Florida, there’s no need to worry. Ben Handyman is here to help you. Ben Handyman is a professional handyman company located in Plymouth, Florida. We specialize in various home repair services, including drywall repair, painting, and maintenance. We understand that not everyone has the expertise and time to repair their walls, so we offer affordable and efficient services to help you. If you’re planning to repair drywall, you must know how to achieve a seamless finish. Here’s how you can do it: Prepare the surface Before you start repairing the drywall, you must prepare the surface. The surface should be free of dust, debris, and any loose materials. Use a clean cloth or a vacuum cleaner to remove any dirt from the area. If the damage is extensive, you may need to cut away the damaged section and replace it with new drywall. Apply the drywall patch Once you’ve prepared the surface, it’s time to apply the drywall patch. You can find drywall patches at any hardware store or home improvement store. Cut the patch to the size of the hole or dent and apply it to the wall. Use a putty knife to spread the joint compound over the patch and smooth it out. Sand the patch After the joint compound dries, use fine-grit sandpaper to sand the patch. Be careful not to sand too much, as it can damage the surrounding area. The goal is to make the surface smooth and level. Apply a second coat of joint compound Once you’ve sanded the patch, apply a second coat of joint compound. This coat should be thicker than the first one, and you should extend it a little beyond the edges of the patch. Use a putty knife to spread the compound evenly over the surface. Sand the second coat After the second coat of the joint compound has dried, use fine-grit sandpaper to sand the surface. This time, you should sand it until it’s completely smooth and even. Be sure to sand the edges of the patch so that they blend seamlessly into the wall. Apply the final coat After sanding the second coat, apply the final coat of the joint compound. This coat should be very thin and should only cover the edges of the patch. Use a putty knife to spread the compound evenly over the surface. Be sure to feather the edges of the compound so that they blend seamlessly into the wall. Sand the final coat Once the final coat has dried, use fine-grit sandpaper to sand the surface. Be sure to sand it until it’s completely smooth and even. If necessary, you can apply a touch-up coat of joint compound and repeat the sanding process until the surface is perfectly smooth. In conclusion, repairing drywall is not as difficult as it may seem. With a little practice and the right tools, you can achieve a seamless finish. If you live in Plymouth, Florida, and need help with drywall repair, contact Ben Handyman. Our team of professionals is always ready to help you with your home repair needs. Remember, a small repair today can save you from significant expenses in the future. Contact Ben Handyman about Drywall Repair Call or text: 352-561-3616 Tap To Call Tap To Text Or Request Service REQUEST SERVICE Search terms you might use to find this page: Drywall repair Plymouth Florida Home repair services Plymouth Florida Professional handyman Plymouth Florida Ben Handyman Plymouth Florida Drywall repair in Plymouth How to repair drywall in Plymouth Florida Drywall patching in Plymouth Home maintenance services Plymouth Florida Affordable drywall repair Plymouth Expert handyman services in Plymouth Drywall repair and painting in Plymouth Florida Best handyman company Plymouth Florida Repairing walls in Plymouth Tips for seamless drywall repair DIY drywall repair in Plymouth Step-by-step drywall repair Plymouth Drywall hole repair in Plymouth Florida Plymouth home improvement services How to prepare drywall surface for repair Finding a reliable handyman in Plymouth Patching dents in drywall Plymouth Florida Smooth finish drywall repair Plymouth Sanding techniques for drywall repair Second coat of joint compound Plymouth Final coat of joint compound for seamless repair Achieving a seamless drywall finish in Plymouth How to feather edges in drywall repair Professional drywall repair Plymouth Florida Plymouth drywall repair specialists Tools for repairing drywall in Plymouth Plymouth home repair solutions Affordable drywall repair services Plymouth Maintaining property value in Plymouth Florida Professional painting services Plymouth Fixing small holes in drywall Plymouth Efficient drywall repair in Plymouth Finding reliable home repair services in Plymouth Florida Ben Handyman’s drywall repair expertise Plymouth drywall repair and maintenance Home improvement tips for Plymouth residents Repairing drywall dents in Plymouth Florida Choosing the right drywall patch in Plymouth Recommended sandpaper for drywall repair Plymouth Drywall repair benefits for property value in Plymouth Quick and affordable drywall repair Plymouth Professional drywall repair techniques in Plymouth Repairing damaged drywall in Plymouth Florida Fixing unsightly drywall in Plymouth Skilled handyman services in Plymouth Expert drywall repair in Plymouth Florida
How to Get a Seamless Finish When Patching Drywall in Orlando West Florida
As a homeowner in Orlando West, you may find yourself in need of patching drywall at some point. Drywall is a common building material used in many homes, and it’s susceptible to damage, whether from accidents or everyday wear and tear. Patching drywall can be a simple task, but achieving a seamless finish requires some skill and attention to detail. This is where a handyman service like Ben Handyman can come in handy. Ben Handyman is a local handyman business in Orlando West that offers a range of services, including drywall repair and installation. Their team of experienced professionals can help you achieve a seamless finish when patching drywall. In this article, we’ll discuss some tips and techniques that can help you get a flawless finish when patching drywall. Gather the necessary tools and materials Before starting the patching process, make sure you have all the necessary tools and materials. You’ll need a drywall saw, sandpaper, drywall mud, a putty knife, a mesh patch, and paint. You can find all of these materials at a hardware store or home improvement center in Orlando West. Prepare the area Before applying the patch, you’ll need to prepare the damaged area. This involves removing any loose or damaged drywall material and cleaning the area. Use a drywall saw to remove any damaged material, and use sandpaper to smooth out the edges of the hole. Wipe the area clean with a damp cloth to remove any dust or debris. Apply the patch Once the area is clean and dry, apply the mesh patch. The patch should be slightly larger than the hole to ensure a secure fit. Press the patch firmly over the hole and use a putty knife to smooth out any wrinkles. Apply a thin layer of drywall mud over the patch, making sure to cover the edges of the mesh. Smooth out the mud with the putty knife, and let it dry completely. Sand and repeat After the mud has dried, use sandpaper to smooth out the surface. Sand lightly at first, and gradually increase the pressure until the surface is smooth and level. If necessary, apply another layer of drywall mud, let it dry, and sand again until the surface is smooth and level. Paint Once the surface is smooth and level, it’s time to paint. Use paint that matches the color of the surrounding walls. Apply the paint with a brush or roller, and let it dry completely before applying a second coat. Getting a seamless finish when patching drywall takes time, patience, and attention to detail. If you don’t have the time or experience to do it yourself, consider hiring a professional handyman service like Ben Handyman. They have the tools, materials, and expertise to get the job done right, saving you time and hassle. In conclusion, patching drywall is a common task for homeowners in Orlando West. To achieve a seamless finish, it’s essential to gather the necessary tools and materials, prepare the damaged area, apply the patch, sand, and repeat if necessary, and paint. If you’re unsure about your ability to do the job yourself, consider hiring a professional handyman service like Ben Handyman to help you achieve a flawless finish. Contact Ben Handyman about Drywall Patching Call or text: 352-561-3616 Tap To Call Tap To Text Or Request Service REQUEST SERVICE Search terms you might use to find this page: Patching drywall in Orlando West Drywall repair in Orlando, Florida Handyman services in Orlando West Ben Handyman in Orlando West Tips for patching drywall in Orlando How to achieve a seamless finish when patching drywall in Orlando West Patching drywall tips and techniques in Orlando, FL Orlando West handyman services for drywall repair Best handyman service for patching drywall in Orlando Drywall repair experts in Orlando West How to patch drywall in Orlando, Florida Patching drywall guide for homeowners in Orlando West Orlando West home improvement: Patching drywall DIY drywall patching in Orlando, FL Steps for patching drywall in Orlando West Orlando West handyman for drywall repair Professional drywall patching in Orlando, Florida Drywall repair in Orlando West made easy Ben Handyman: Expert drywall repair in Orlando Orlando West drywall repair services Patching drywall like a pro in Orlando, FL How to get a flawless finish when patching drywall in Orlando West Drywall repair tips for Orlando homeowners Orlando West handyman: Patching drywall made simple Where to find drywall repair materials in Orlando, Florida Orlando West hardware stores for drywall patching supplies Drywall saw for patching in Orlando, FL Sandpaper for drywall repair in Orlando West Drywall mud for seamless patching in Orlando, Florida Putty knife for patching drywall in Orlando West Mesh patch for drywall repair in Orlando, FL Paint for finishing drywall patches in Orlando West How to prepare the damaged drywall area in Orlando, Florida Removing loose drywall material in Orlando West Cleaning the damaged area for drywall patching in Orlando, FL Drywall saw techniques for patching in Orlando West Smoothing out edges of the hole in Orlando, Florida Wiping the area clean for drywall patching in Orlando West Applying the mesh patch in Orlando, FL Securing the mesh patch for drywall repair in Orlando West Smoothing out wrinkles in the mesh patch in Orlando, Florida Applying drywall mud for a seamless finish in Orlando West Covering the edges of the mesh with drywall mud in Orlando, FL Using a putty knife for drywall mud application in Orlando West Drying process for drywall mud in Orlando, Florida Sanding techniques for smooth drywall patches in Orlando West Leveling the surface for seamless drywall repair in Orlando, FL Applying paint to drywall patches in Orlando West Choosing the right paint color for drywall repair in Orlando, Florida Hiring a professional handyman for drywall patching in Orlando West
How to Get a Seamless Finish When Patching Drywall in Okahumpka Florida
As a homeowner, you may be familiar with the need to patch your drywall from time to time. Whether it’s due to an accident, wear, and tear, or just the passage of time, it’s important to know how to get a seamless finish when patching drywall. That’s where Ben Handyman comes in – as a handyman business based in Okahumpka, Florida, we’re well-versed in all kinds of home repairs, including drywall patching. In this article, we’ll walk you through the steps to achieving a seamless finish when patching your drywall. Step 1: Prepare the Surface Before you begin the patching process, it’s important to prepare the surface. This means cleaning the area thoroughly with a damp cloth and allowing it to dry completely. You’ll also want to remove any loose drywall paper or debris that may be present around the area you’re patching. If there are any large holes, you may want to use a mesh patch to help reinforce the area. Step 2: Apply the Joint Compound The joint compound is what will help fill in the gaps between the existing drywall and the patch. Using a putty knife, apply a thin layer of joint compound to the area you’re patching. Be sure to spread it evenly and smoothly to avoid any bumps or ridges. If you’re using a mesh patch, make sure to embed it in the joint compound and then apply another layer of compound on top. Step 3: Sand and Repeat Once the joint compound is dry, you’ll need to sand it down to achieve a smooth surface. Use fine-grit sandpaper and sand in a circular motion to avoid leaving any noticeable marks. After sanding, wipe the area with a damp cloth to remove any dust. If you notice any imperfections, apply another layer of joint compound and repeat the sanding process until you achieve a seamless finish. Step 4: Prime and Paint The final step is to prime and paints the patched area to match the surrounding drywall. This will help the patch blend in seamlessly and avoid any noticeable color differences. Be sure to use a high-quality primer and paint to achieve the best results. At Ben Handyman, we understand the importance of a seamless finish when patching drywall. As a handyman business based in Okahumpka, Florida, we’ve helped numerous homeowners achieve a flawless finish when patching their drywall. We’re well-equipped with the tools and expertise to handle any drywall patching project, no matter the size or complexity. In addition to drywall patching, we offer a wide range of handyman services to help you maintain and improve your home. Whether you need help with plumbing, electrical, or general repairs, we’re here to help. We take pride in our work and always strive to deliver the highest quality service to our clients. In conclusion, patching drywall is a necessary task for any homeowner, but achieving a seamless finish can be challenging. By following these steps, you can achieve a professional-looking finish that will seamlessly blend in with the surrounding drywall. If you’re ever in need of handyman services in Okahumpka, Florida, be sure to give Ben Handyman a call. We’re always here to help with any home repair or maintenance needs you may have. Contact Ben Handyman about Drywall Patching Call or text: 352-561-3616 Tap To Call Tap To Text Or Request Service REQUEST SERVICE Search terms you might use to find this page: Okahumpka Florida drywall patching How to patch drywall seamlessly in Okahumpka Ben Handyman Okahumpka drywall patching Home repairs Okahumpka Florida Drywall patching guide Okahumpka Achieving a seamless finish in Okahumpka Patching drywall in Okahumpka step-by-step Okahumpka professional drywall patching Tips for patching drywall in Okahumpka Okahumpka handyman for drywall repairs Patching drywall in Okahumpka like a pro Okahumpka Florida home repair services How to get a seamless finish when patching drywall Ben Handyman guide to patching drywall in Okahumpka Okahumpka expert drywall patching Okahumpka drywall repair and maintenance Drywall patching techniques in Okahumpka Florida Step-by-step drywall patching in Okahumpka Best practices for drywall patching in Okahumpka Okahumpka drywall patching services DIY drywall patching in Okahumpka Okahumpka handyman for drywall patching Seamless drywall patching in Okahumpka Florida Okahumpka home repairs and maintenance Patching drywall in Okahumpka with Ben Handyman Okahumpka drywall patching tutorial Okahumpka Florida handyman services Drywall patching solutions in Okahumpka Okahumpka professional drywall repairs Step-by-step guide to patching drywall in Okahumpka Okahumpka home improvement and repair services Seamless drywall patching tips Okahumpka Florida Okahumpka drywall patching experts Drywall repair in Okahumpka with Ben Handyman Okahumpka Florida DIY drywall patching Okahumpka expert in drywall patching Professional drywall patching in Okahumpka Florida Okahumpka home repair specialists Seamless finish for drywall patching in Okahumpka Okahumpka Florida drywall repair services Drywall patching advice in Okahumpka Okahumpka handyman for seamless drywall repairs Okahumpka Florida drywall patching tutorial Best drywall patching techniques in Okahumpka Okahumpka expert drywall repair and maintenance Drywall patching guide for Okahumpka homeowners Okahumpka professional home repair services Okahumpka drywall patching specialists DIY guide to drywall patching in Okahumpka Florida Okahumpka handyman for flawless drywall repairs
How to Get a Seamless Finish When Patching Drywall in Ocoee Florida
If you’ve ever had to patch a hole in drywall, you know how challenging it can be to get a seamless finish. Fortunately, with a few simple tips and tricks, you can achieve a professional-looking result that will make your repair almost invisible. As a handyman business serving the community of Ocoee, Florida, we at Ben Handyman have seen and repaired all kinds of drywall damage, and we’re happy to share our knowledge with you. Prepare the Surface The first step to achieving a seamless finish when patching drywall is to prepare the surface. This means cleaning the area around the hole and removing any loose debris or flaking paint. You can use a putty knife or a drywall saw to gently scrape away any loose material. Next, use sandpaper or a sanding sponge to smooth the edges of the hole and create a surface that is flush with the surrounding drywall. If the hole is large or irregularly shaped, you may need to use a drywall saw to cut away any damaged or protruding pieces. Apply Joint Compound Once you have prepared the surface, it’s time to apply the joint compound. This is a plaster-like material that is used to fill in the hole and create a smooth, even surface. You can find joint compounds at any home improvement store, and it’s available in different formulations, including ready-mixed and powder forms. Using a putty knife or a drywall taping knife, apply a thin layer of joint compound over the hole, starting from the center and working your way outwards. Be sure to smooth the edges of the compound so that it blends seamlessly with the surrounding drywall. You may need to apply multiple coats, allowing each one to dry completely before sanding and applying the next. Sand and Prime Once the joint compound has dried completely, it’s time to sand the surface to achieve a smooth finish. Use a fine-grit sandpaper or a sanding sponge to gently sand the surface of the compound, being careful not to sand away too much and create a depression. This step is essential for achieving a seamless finish. After sanding, you’ll need to prime the surface before painting. Primer is a type of paint that is designed to adhere to drywall and create a smooth, even surface for painting. It will also help the paint adhere more evenly and prevent it from soaking into the drywall and creating a blotchy appearance. Apply the final coat of paint After the primer has dried, you can apply the final coat of paint. Use a roller or a paintbrush to apply the paint evenly, and be sure to overlap your strokes to avoid leaving visible brush marks. If necessary, you may need to apply multiple coats to achieve the desired color and finish. Tips and Tricks Here are a few additional tips and tricks to help you achieve a seamless finish when patching drywall: Use a wider putty knife or taping knife to apply the joint compound over a larger area than the hole. This will help to blend the edges of the patch more seamlessly with the surrounding drywall. Be patient and allow each layer of joint compound to dry completely before sanding and applying the next. Rushing the process can lead to a bumpy, uneven finish. When sanding, use a sanding sponge to achieve a smooth, even surface. Sandpaper can be too rough and may create scratches or unevenness. Choose a paint color that closely matches the surrounding drywall. This will help to camouflage the repair and make it less visible. In conclusion, achieving a seamless finish when patching drywall takes a bit of time and effort, but the results are worth it. With the right tools and techniques, you can create a repair that is virtually invisible and make your walls look as good as new in no time. And if you need help, don’t hesitate to call in the experts at Ben Handyman. Contact Ben Handyman about Drywall Patching Call or text: 352-561-3616 Tap To Call Tap To Text Or Request Service REQUEST SERVICE Search terms you might use to find this page: How to patch drywall holes in Ocoee, Florida Tips for seamless drywall repair in Ocoee, Florida Achieving a professional finish for drywall repair in Ocoee, Florida Ocoee, Florida drywall repair tips and tricks Patching drywall in Ocoee, Florida: achieving a seamless finish Step-by-step guide to seamless drywall repair in Ocoee, Florida Handyman advice: seamless drywall repair in Ocoee, Florida Ocoee, Florida drywall repair: expert tips for a seamless finish How to prepare and patch drywall in Ocoee, Florida Seamless drywall repair techniques in Ocoee, Florida Ocoee, Florida drywall repair: achieving a professional look DIY drywall repair in Ocoee, Florida: achieving a seamless finish Best practices for drywall repair in Ocoee, Florida Patching drywall holes in Ocoee, Florida: expert advice Step-by-step guide to seamless drywall patching in Ocoee, Florida Ocoee, Florida drywall repair: achieving an invisible finish Handyman tips for seamless drywall repair in Ocoee, Florida Ocoee, Florida drywall repair: how to get a professional result Techniques for seamless drywall repair in Ocoee, Florida Ocoee, Florida drywall repair: tips for a flawless finish How to patch drywall holes like a pro in Ocoee, Florida Achieving a seamless finish in Ocoee, Florida drywall repair Ocoee, Florida drywall repair: expert tips and tricks Professional techniques for drywall repair in Ocoee, Florida How to achieve a seamless drywall repair in Ocoee, Florida Ocoee, Florida drywall repair: achieving a smooth surface Essential steps for seamless drywall repair in Ocoee, Florida Ocoee, Florida drywall repair: achieving an invisible patch Handyman guide to seamless drywall repair in Ocoee, Florida Ocoee, Florida drywall repair: tips for a professional finish Secrets to seamless drywall repair in Ocoee, Florida Ocoee, Florida drywall repair: achieving a flawless result How to patch and blend drywall in Ocoee, Florida Achieving a seamless finish in Ocoee, Florida drywall patching Ocoee, Florida drywall repair: expert techniques for a perfect finish Tips and tricks
How to Get a Seamless Finish When Patching Drywall in Mount Dora Florida
Drywall is a common building material that can be found in almost every home. It is used to create walls, ceilings, and other surfaces, and it provides a smooth, uniform finish that is easy to paint and decorate. However, over time, drywall can become damaged, and holes or cracks may appear. This can be due to a variety of factors, such as accidents, general wear, and tear, or even changes in temperature and humidity. Patching drywall may seem like a simple task, but it can be challenging to achieve a seamless finish. A poorly executed drywall patch can be unsightly and can even detract from the overall look of your home. Fortunately, there are steps you can take to ensure that your drywall repairs look as good as new. If you live in Mount Dora or the surrounding area and you need help with drywall repairs, you can count on Ben Handyman to provide you with high-quality, reliable services. In this article, we’ll share some tips from Ben Handyman on how to get a seamless finish when patching drywall. Start with a clean and smooth surface Before you begin patching the drywall, it’s important to prepare the surface properly. Start by removing any loose debris or debris that may have accumulated around the area to be repaired. Next, use a drywall knife or sandpaper to smooth out the edges of the hole or crack. This will help ensure that the patch will adhere properly and will create a smooth, even finish. Use the right materials To achieve a seamless finish, it’s important to use the right materials. Ben Handyman recommends using a high-quality drywall patching compound that is easy to sand and dries quickly. This will help you achieve a smooth finish that is easy to paint or texture. Apply the patching compound in thin layers When applying the patching compound, it’s important to use thin, even layers. Apply the first layer of the compound and then use a drywall knife to smooth it out. Once the first layer is dry, apply a second layer and repeat the process. Depending on the size of the hole or crack, you may need to apply several layers of compound. Sand the surface between layers To achieve a seamless finish, it’s important to sand the surface between layers of patching compound. This will help you remove any bumps or ridges that may have formed during the patching process. Be sure to use fine-grit sandpaper, as a coarser grit may leave scratches or marks on the surface. Prime the surface before painting Before you paint the patched area, be sure to prime the surface first. This will help ensure that the paint adheres properly and will help you achieve a smooth, even finish. Be sure to choose a high-quality primer that is specifically designed for use on drywall. Ben Handyman is a trusted handyman service provider in Mount Dora and the surrounding areas. We understand the challenges of drywall repair, and we have the experience and expertise to help you achieve a seamless finish. Our team of professionals uses only the highest-quality materials and tools to ensure that your repairs are done right the first time. In conclusion, patching drywall is a common task for homeowners, but achieving a seamless finish can be challenging. By following these tips from Ben Handyman, you can ensure that your repairs look as good as new. If you need help with drywall repairs or any other handyman services in Mount Dora, contact Ben Handyman today. Our team of professionals is ready to help you tackle any project, big or small. Contact Ben Handyman about Drywall Patching Call or text: 352-561-3616 Tap To Call Tap To Text Or Request Service REQUEST SERVICE Search terms you might use to find this page: Drywall repair Mount Dora FL Patching drywall tips Mount Dora How to achieve a seamless finish with drywall repairs Ben Handyman drywall repair services in Mount Dora Reliable drywall repair in Mount Dora Best drywall repair company in Mount Dora Florida Professional drywall patching in Mount Dora Mount Dora handyman services for drywall repairs Seamless drywall repairs in Mount Dora FL How to patch drywall in Mount Dora Tips for patching drywall in Mount Dora homes Mount Dora drywall repair contractor High-quality drywall patching in Mount Dora area Drywall repair near me in Mount Dora Professional handyman for drywall repairs in Mount Dora Reliable drywall repair solutions in Mount Dora FL Mount Dora drywall patching techniques Best materials for drywall repairs in Mount Dora Smooth finish drywall repairs in Mount Dora How to repair drywall cracks in Mount Dora homes Expert tips for seamless drywall repairs in Mount Dora Professional drywall repair services in Mount Dora and surrounding areas Ben Handyman drywall repair guide in Mount Dora Mount Dora drywall repair specialists How to prepare drywall surface for patching in Mount Dora Tips for achieving a smooth finish when patching drywall in Mount Dora Quality drywall patching compound for Mount Dora repairs Mount Dora drywall knife and sandpaper techniques How many layers of compound for drywall repairs in Mount Dora Sanding techniques for seamless drywall repairs in Mount Dora Choosing the right primer for drywall repairs in Mount Dora Steps for priming patched drywall in Mount Dora Professional handyman services for drywall repairs in Mount Dora How to paint patched drywall in Mount Dora homes Reliable Mount Dora handyman for drywall repairs Tips for hiring a drywall repair contractor in Mount Dora Best drywall repair techniques in Mount Dora FL Seamless finish drywall repairs in Mount Dora and surrounding areas Experienced drywall repair specialists in Mount Dora Drywall repairs done right the first time in Mount Dora Tips for tackling drywall repairs in Mount Dora homes Ben Handyman’s expertise in drywall repairs in Mount Dora Mount Dora professional drywall patching services Reliable solutions for drywall repairs in Mount Dora FL How to make drywall repairs look as good as new in Mount Dora Quality materials and tools